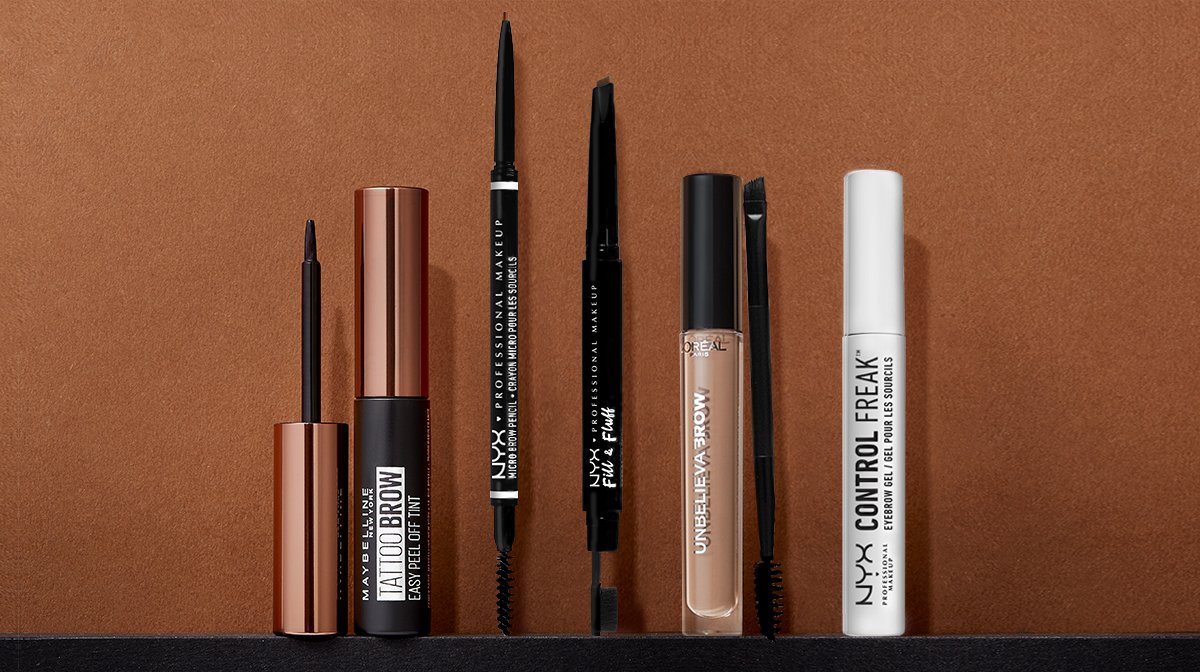
As the weeks without our beloved brow appointments have worn on we’ve all been dabbling in a bit of brow DIY to keep us going with something that vaguely resembles our normal eyebrow shape. With the latest announcement that sadly, beauty salons are not able to open yet, it’s time to take matters into our own hands and step up to the mirror to tidy those unruly arches ourselves. We have put together a step by step guide for achieving perfectly shaped eyebrows effortlessly using the best selling brow products and some easy to follow tips and tricks.
Step 1: Shape
Start by tidying up your brows by shaping and trimming (or waxing if you’re feeling brave) where necessary. The beginning of your brows should start on the point in a straight line from the side of your nose. Next, plot the arch (the highest point of your brow) on the point from the line running from the tip of your nose through your pupil (use a ruler for this if it helps). Finally, find the end of your brow on the line from the corner of your nose through the outer corner of your eye. Once you have mapped out a rough guideline, pluck any overgrowth or strays and trim where necessary, using a brow brush to help you keep each hair in place, until you have perfectly pointed, flawless arches.
Step 2: Tint
If you’re missing your usual salon tint but are too scared to take the plunge on a permanent treatment at home, this is the risk-free semi-permanent solution. Maybelline’s Tattoo Brow Peel Off Gel is a brow gel that will leave your eyebrows tinted and looking naturally fuller for up to 3 days, the perfect way to practise your tinting skills without the worry. The easy to apply gel gives fuller looking eyebrows in 3 simple steps:
- Apply a thick layer of the gel to clean eyebrows in your desired brow shape. If you make a mistake simply wipe away with a cotton bud or tissue soaked in makeup remover.
- Leave the gel to set for at least 20 minutes. For super long wear leave for up to 2 hours – or even overnight.
- Use fingers to peel the product from your eyebrows (don’t worry it isn’t sticky so won’t pull out the hairs!).
Step 3: Fill & Define
First, decide what brow type you’re aiming for as this will greatly impact the products you should be using. We’ve picked out a few classic looks and what you will need to achieve them to help you out.
For a defined brow
For a more groomed and perfected look the NYX Professional Makeup Micro Brow Pencil is your best friend. Achieve enviable arches with the dual-ends that help to create fuller, thicker-looking brows with ease. The ultra-fine tip offers precise, mistake-free application that mimics natural brow hairs with ultra-fine lines. The application is so precise it coats even the finest hairs with colour for a natural looking finish to create definition or to build into a bushier brow lamination look if desired. The mechanical pencil has an easy twist- up mechanism meaning you won’t need to hunt for a sharpener, whilst its spoolie brush expertly grooms, controls and blends unruly brows for a professional finish. To achieve a salon worthy look, use short, upwards strokes in the direction of hair growth. Fill in any sparse areas or gaps and extend where necessary. Make sure to blend the pencil in with the spoolie end of the pencil as you go for even, natural looking coverage and always apply your brow products in really good light, preferably sunlight so that you can assess colour density as you build the brow. Always finish off application by brushing through with the spoolie after drawing on your brow to soften the edges.
For a low maintenance HD brow
If you prefer a more temporary tint that can be applied daily and will also groom your brows into place, this has you covered. Easy and fast to apply, the L’Oreal Paris Unbelieva’brow sets in just 90 seconds and can last for days if desired, or can be easily washed off. The smudge-proof, transfer-proof and waterproof formula will give you HD brows without the commitment and no touch ups needed! Follow these three steps to beautiful brows:
- Lightly apply your chosen shade to your brows to fill in sparse areas.
- Use the angled brush to outline and define your brow shape, or for a more subtle brow look, use the micro-angled brow brush to create hair-like strokes. If you make a mistake or apply too much, it can easily be wiped off with a cotton bud or tissue and some makeup remover.
- Comb through your brows with the spoolie and wait for 90 seconds for the formula to set.
For a fluffy brow
If you prefer a fuller and fluffier brow, try the NYX Professional Makeup Fill & Fluff Eyebrow Pomade Pencil. The retractable, teardrop-shaped pomade bullet allows for shading, whilst the micro paddle brush is ideal for blending out the pigment for a fuller look. It comes in six matte colours with a smooth, waxy texture and pigmented finish, perfect for building controllable volume; just what your makeup routine needs to up your brow game.
Step 4: Set
Don’t let all of your fine arch artwork go to waste, lock your brows’ colour and shape in place with the clear, non-sticky formula of NYX Professional Makeup Control Freak Clear Brow Gel that glides effortlessly onto brows working well over powder, pencil or tinted brows to seal the deal! Alternatively use before application to help create initial shape before building up with product or wear alone for a super natural look. Either brush upwards for a more laminated look or follow the natural curve of your brow for a sleek, tamed and groomed brow finish.
Shop all brow products on lookfantastic here.


